1. 安装 nginx
1.1 nginx 包及其依赖包下载
出于模块的依赖性,Nginx 依赖以下三个包:
gzip 模块需要 zlib 库(http://www.zlib.net/);
rewrite 模块需要 pcre 库(http://www.pcre.org/);
ssl 功能需要 openssl 库(http://www.openssl.org/);
分别下载它们的最新稳定版(截至本文最新稳定版分别是 zlib-1.2.8.tar.gz、pcre-8.36.tar.gz、openssl-fips-2.0.9.tar.gz),最后下载 Nginx 最新(http://nginx.org/en/download.html)稳定版(截至本文最新稳定版是 nginx-1.7.10.tar.gz)。
依赖包安装次序为:openssl、zlib、pcre,最后安装 Nginx 包。
1.2 nginx 包及其依赖包安装
1.2.1 安装 openssl
$ tar -zxvf openssl-fips-2.0.9.tar.gz
$ cd openssl-fips-2.0.9
$ ./config
$ make
$ sudo make install
1.2.2 安装 zlib
$ tar -zxvf zlib-1.2.8.tar.gz
$ cd zlib-1.2.8
$ ./configure
$ make
$ sudo make install
1.2.3 安装 pcre
$ tar -zxvf pcre-8.36.tar.gz
$ cd pcre-8.36
$ ./configure
$ make
$ sudo make install
1.2.4 安装 nginx
$ tar -zxvf nginx-1.7.10.tar.gz
$ cd nginx-1.7.10
$ ./configure --with-pcre=../pcre-8.36 --with-zlib=../zlib-1.2.8 --with-openssl=../openssl-fips-2.0.9
$ make
$ sudo make install
nginx 被默认安装在 /usr/local/nginx 目录。
1.3 验证 Nginx 是否安装成功
$ sudo /usr/local/nginx/sbin/nginx -t
nginx: the configuration file /usr/local/nginx/conf/nginx.conf syntax is ok
nginx: configuration file /usr/local/nginx/conf/nginx.conf test is successful
证明 Nginx 安装成功。
2. SSL 服务器 / 客户端双向验证证书的生成
2.1 创建一个新的 CA 根证书
在 nginx 安装目录下新建 ca 文件夹,进入 ca,创建几个子文件夹:
$ sudo mkdir ca
$ cd ca
$ sudo mkdir newcerts private conf server
newcerts 子目录将用于存放 CA 签署过的数字证书(证书备份目录);private 用于存放 CA 的私钥;conf 目录用于存放一些简化参数用的配置文件;server 存放服务器证书文件。
2.1.1 conf 目录新建 openssl.conf 文件
编辑其内容如下:
[plain] view plain copy print?在CODE上查看代码片派生到我的代码片
[ ca ]
default_ca      = foo                   # The default ca section

[ foo ]
dir            = /usr/local/nginx/ca         # top dir
database       = /usr/local/nginx/ca/index.txt          # index file.
new_certs_dir  = /usr/local/nginx/ca/newcerts           # new certs dir

certificate    = /usr/local/nginx/ca/private/ca.crt         # The CA cert
serial         = /usr/local/nginx/ca/serial             # serial no file
private_key    = /usr/local/nginx/ca/private/ca.key  # CA private key
RANDFILE       = /usr/local/nginx/ca/private/.rand      # random number file

default_days   = 365                     # how long to certify for
default_crl_days= 30                     # how long before next CRL
default_md     = md5                     # message digest method to use
unique_subject = no                      # Set to 'no' to allow creation of
                                         # several ctificates with same subject.
policy         = policy_any              # default policy

[ policy_any ]
countryName = match
stateOrProvinceName = match
organizationName = match
organizationalUnitName = match
localityName            = optional
commonName              = supplied
emailAddress            = optional
2.1.2 生成私钥 key 文件
$ cd /usr/local/nginx/ca
$ sudo openssl genrsa -out private/ca.key
输出
Generating RSA private key, 512 bit long modulus
..++++++++++++
.++++++++++++
e is 65537 (0x10001)
private 目录下有 ca.key 文件生成。
博主 20150520 加注:openssl 默认生成 512 位的。一般是用 2048 位的。
2.1.3 生成证书请求 csr 文件
$ sudo openssl req -new -key private/ca.key -out private/ca.csr
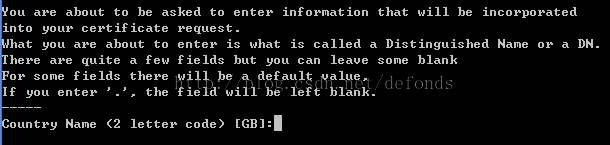
提示输入 Country Name,输入 CN 并回车后:

提示输入 State or Province Name (full name),输入 Shanghai 并回车后:

提示输入 Locality Name,输入 Shanghai 并回车后:

提示输入 Organization Name,输入 Defonds 并回车后:
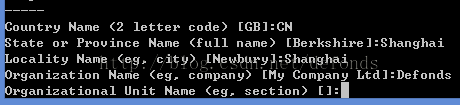
提示输入 Organizational Unit Name,输入 Dev 并回车后:
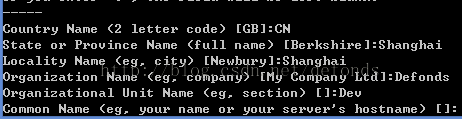
提示输入 Common Name,如果没有域名的话,输入 localhost 并回车后:
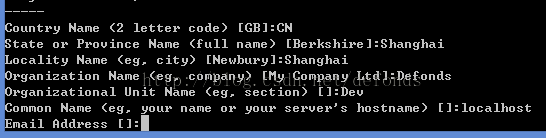
提示输入 Email Address,输入 defonds@163.com 并回车后:
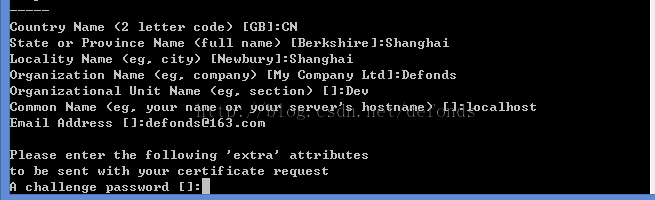
提示输入 A challenge password,这个是根证书口令。输入 defonds 并回车后:
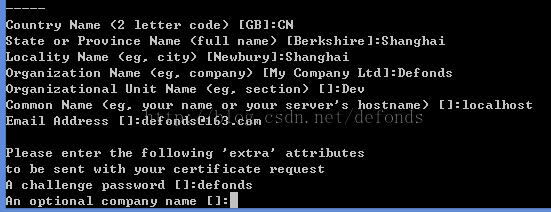
提示输入 An optional company name,输入 df 并回车。private 目录下有 ca.csr 文件生成。
2.1.4 生成凭证 crt 文件
$ sudo openssl x509 -req -days 365 -in private/ca.csr -signkey private/ca.key -out private/ca.crt
控制台输出
Signature ok
subject=/C=CN/ST=Shanghai/L=Shanghai/O=Defonds/OU=Dev/CN=localhost/emailAddress=defonds@163.com
Getting Private key
private 目录下有 ca.crt 文件生成。
2.1.5 为我们的 key 设置起始序列号
$ sudo echo FACE > serial
可以是任意四个字符
2.1.6 创建 CA 键库
$ sudo touch index.txt
2.1.7 为 "用户证书" 的移除创建一个证书撤销列表
$ sudo openssl ca -gencrl -out /usr/local/nginx/ca/private/ca.crl -crldays 7 -config "/usr/local/nginx/ca/conf/openssl.conf"
输出
Using configuration from /usr/local/nginx/ca/conf/openssl.conf
private 目录下有 ca.crl 文件生成。
2.2 服务器证书的生成
2.2.1 创建一个 key
$ sudo openssl genrsa -out server/server.key
输出
Generating RSA private key, 512 bit long modulus
...........................++++++++++++
.................++++++++++++
e is 65537 (0x10001)
server 目录下有 server.key 文件生成。
博主 20150520 加注:openssl 默认生成 512 位的。一般是用 2048 位的:sudo openssl genrsa -out server/server.key 2048
2.2.2 为我们的 key 创建一个证书签名请求 csr 文件
$ sudo openssl req -new -key server/server.key -out server/server.csr
这时会要求你输入和 2.1.2.2 步一样的那些问题,所有输入需要和那一步一致。但 A challenge password 是服务器证书口令,可以与根证书口令一致。这里:
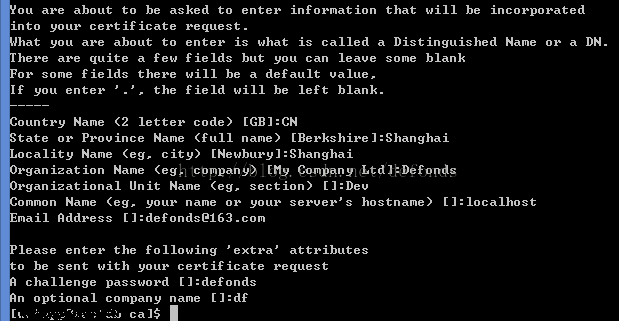
服务器csr的创建
server 目录下有 server.csr 文件生成。
2.2.3 使用我们私有的 CA key 为刚才的 key 签名
$ sudo openssl ca -in server/server.csr -cert private/ca.crt -keyfile private/ca.key -out server/server.crt -config "/usr/local/nginx/ca/conf/openssl.conf"
输出
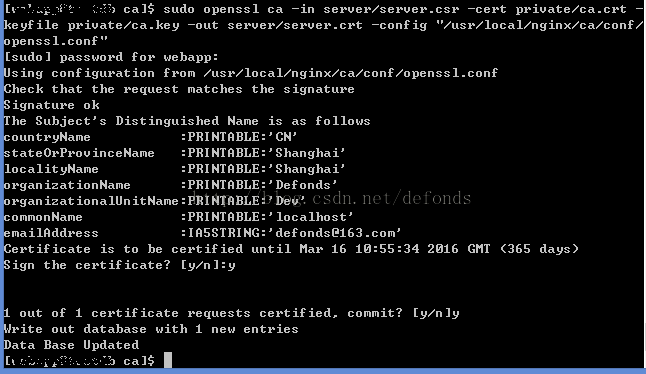
服务器key签名
两次都输入 y,server 目录下有 server.crt 文件生成。
2.3 客户端证书的生成
2.3.1 创建存放 key 的目录 users
$ sudo mkdir users
位置 /usr/local/nginx/ca/users。
2.3.2 为用户创建一个 key
$ sudo openssl genrsa -des3 -out /usr/local/nginx/ca/users/client.key 1024
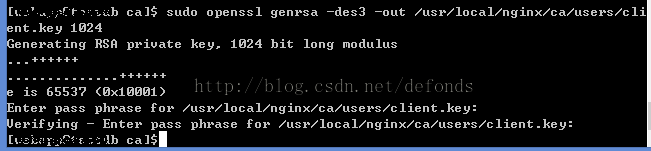
要求输入 pass phrase,这个是当前 key 的口令,以防止本密钥泄漏后被人盗用。两次输入同一个密码(比如我这里输入 defonds),users 目录下有 client.key 文件生成。
2.3.3 为 key 创建一个证书签名请求 csr 文件
$ sudo openssl req -new -key /usr/local/nginx/ca/users/client.key -out /usr/local/nginx/ca/users/client.csr

提示输入 pass phrase,即 client.key 的口令。将 2.3.2 步保存的 pass phrase 输入后并回车:
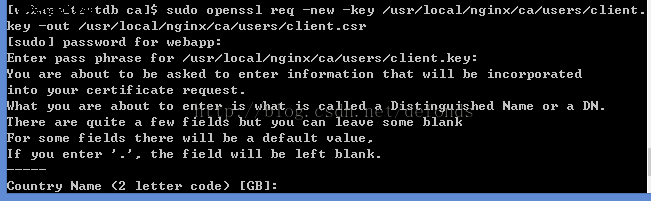
要求你输入和 2.1.3 步一样的那些问题。输入需要和那一步一致。但 A challenge password 是客户端证书口令(请注意将它和 client.key 的口令区分开!),可以与服务器端证书或者根证书口令一致:
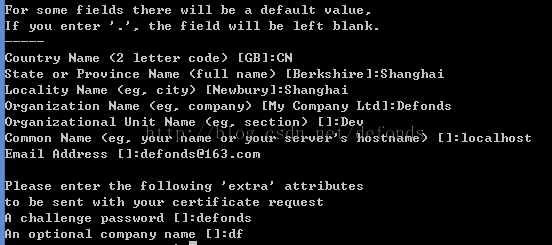
users 目录下有 client.csr 文件生成。
2.3.4 使用我们私有的 CA key 为刚才的 key 签名
$ sudo openssl ca -in /usr/local/nginx/ca/users/client.csr -cert /usr/local/nginx/ca/private/ca.crt -keyfile /usr/local/nginx/ca/private/ca.key -out /usr/local/nginx/ca/users/client.crt -config "/usr/local/nginx/ca/conf/openssl.conf"
输出
Using configuration from /usr/local/nginx/ca/conf/openssl.conf
Check that the request matches the signature
Signature ok
The Subject's Distinguished Name is as follows
countryName           :PRINTABLE:'CN'
stateOrProvinceName   :PRINTABLE:'Shanghai'
localityName          :PRINTABLE:'Shanghai'
organizationName      :PRINTABLE:'Defonds'
organizationalUnitName:PRINTABLE:'Dev'
commonName            :PRINTABLE:'localhost'
emailAddress          :IA5STRING:'defonds@163.com'
Certificate is to be certified until Mar 16 11:47:48 2016 GMT (365 days)
Sign the certificate? [y/n]:y
1 out of 1 certificate requests certified, commit? [y/n]y
Write out database with 1 new entries
Data Base Updated
两次都输入 y,users 目录下有 client.crt 文件生成。
2.3.5 将证书转换为大多数浏览器都能识别的 PKCS12 文件
$ sudo openssl pkcs12 -export -clcerts -in /usr/local/nginx/ca/users/client.crt -inkey /usr/local/nginx/ca/users/client.key -out /usr/local/nginx/ca/users/client.p12

要求输入 client.key 的 pass phrase,输入 2.3.2 步输入的 pass phrase 并回车后:

要求输入 Export Password,这个是客户端证书的保护密码(其作用类似于 2.3.3 保存的口令),在客户端安装证书的时候需要输入这个密码。我还是输入 defonds。users 目录下有 client.p12 文件生成。
3. Nginx 配置
SSL 的目的是为了保证网络通信的安全以及数据完整性。所以,如果 tomcat 前面有了 nginx 作为反向代理,那就没有理由再在 nginx 和 tomcat 之间进行加密传输,毕竟二者处于同一内网。
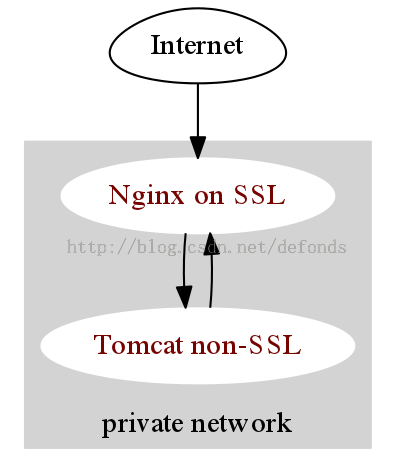
如上图所示,客户端通过 SSL 请求过来的访问被反向代理 nginx 接收,nginx 结束了 SSL 并将请求以纯 HTTP 提交 tomcat。nginx 配置 nginx.conf 如下:
[plain] view plain copy print?在CODE上查看代码片派生到我的代码片
worker_processes  1;

error_log  logs/error.log;
#error_log  logs/error.log  notice;
#error_log  logs/error.log  info;

#pid        logs/nginx.pid;


events {
    worker_connections  1024;
}


http {
    include       mime.types;
    default_type  application/octet-stream;

    log_format  main  '[$time_local] $remote_addr - "$request" '
                      '$status "$http_user_agent" '
                      '"$args"';

    access_log  logs/access.log  main;

    sendfile        on;
    #tcp_nopush     on;

    #keepalive_timeout  0;
    keepalive_timeout  120;
    client_max_body_size    120m;
    client_body_buffer_size 128k;
    server_names_hash_bucket_size 128;
    large_client_header_buffers 4 4k;
    open_file_cache max=8192 inactive=20s;
    open_file_cache_min_uses 1;
    open_file_cache_valid 30s;

    upstream tomcat_server {
    # Tomcat is listening on default 8080 port
        server 192.168.1.177:8080 fail_timeout=0;
    }

    server {
        listen       443;
        server_name  localhost;
        ssi on;
        ssi_silent_errors on;
        ssi_types text/shtml;

        ssl                  on;
        ssl_certificate      /usr/local/nginx/ca/server/server.crt;
        ssl_certificate_key  /usr/local/nginx/ca/server/server.key;
        ssl_client_certificate /usr/local/nginx/ca/private/ca.crt;

        ssl_session_timeout  5m;
        ssl_verify_client on;  #开户客户端证书验证

        ssl_protocols  SSLv2 SSLv3 TLSv1;
        ssl_ciphers ALL:!ADH:!EXPORT56:RC4+RSA:+HIGH:+MEDIUM:+LOW:+SSLv2:+EXP;
        ssl_prefer_server_ciphers   on;

        charset utf-8;
        access_log  logs/host.access.log  main;

        #error_page  404              /404.html;

        # redirect server error pages to the static page /50x.html
        #

        error_page   500 502 503 504  /50x.html;
        location = /50x.html {
                root   html;
        }
        location = /favicon.ico {
                log_not_found off;
                access_log off;
                expires      90d;
        }
        location /swifton/ {
                proxy_pass http://tomcat_server;
                include proxy.conf;
        }

    }
}
其中,tomcat(本例中和 nginx 部署同台机器) 是 nginx 同一局域网段的,swifton 是测试 tomcat 项目。proxy.conf 内容:
[plain] view plain copy print?在CODE上查看代码片派生到我的代码片
proxy_redirect   off;
proxy_set_header   Host             $host;
proxy_set_header   X-Real-IP        $remote_addr;
proxy_set_header   X-Forwarded-For  $proxy_add_x_forwarded_for;
proxy_connect_timeout 60;
proxy_read_timeout 600;
proxy_set_header   X-Forwarded-Proto $scheme;
4. Tomcat 配置
Nginx 反向代理 HTTP 不需要更改 Tomcat 配置。与 HTTP 代理不同的是,这里需要通过更改 tomcat 的配置文件来告诉它前面的 HTTPS 代理。将 %tomcat%/conf/ 以下部分:
[html] view plain copy print?在CODE上查看代码片派生到我的代码片
<Connector port="8080" protocol="HTTP/1.1"
           connectionTimeout="20000"
           redirectPort="8443" />
修改为
[html] view plain copy print?在CODE上查看代码片派生到我的代码片
<Connector port="8080" protocol="HTTP/1.1"
           connectionTimeout="20000"
           redirectPort="8443"
  scheme="https"
  proxyName="localhost"
  proxyPort="443" />
5. 配置验证
5.1 Tomcat 重启验证
重启 tomcat,后台日志没问题,也可以看到小猫界面。
5.2 Nginx 重启验证
先关闭运行中的 nginx,如果你已经开启了的话。
$ sudo ./nginx -t
输出
nginx: [emerg] unknown directive "ssl" in /usr/local/nginx/conf/nginx.conf:50
nginx: configuration file /usr/local/nginx/conf/nginx.conf test failed
ssl 模块没有编译进来。
切换到步骤 1.2.4 里的 nginx 安装目录 nginx-1.7.10,
$ ./configure --with-pcre=../pcre-8.36 --with-zlib=../zlib-1.2.8  --with-http_ssl_module
$ sudo make
$ sudo make install
Nginx 重装成功。再次
$ sudo ./nginx -t
提示测试成功。
启动 nginx。
5.3 客户访问 ssl 验证
谷歌浏览器使用 https 访问原有项目 https://192.168.1.177/swifton,177 是 Nginx 所在服务器,提示 400 Bad Request(No required SSL certificate was sent):
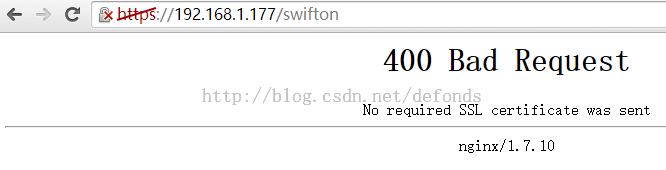
这是因为 https 双向验证需要客户端安装证书。windows os 下拿到步骤 2.3.5 生成的证书 client.p12,直接双击它,进入 "证书导入向导":
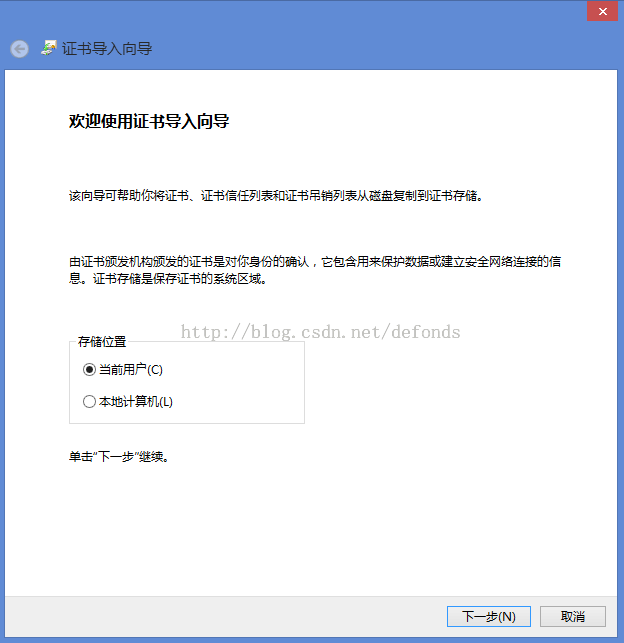
点击 "下一步":
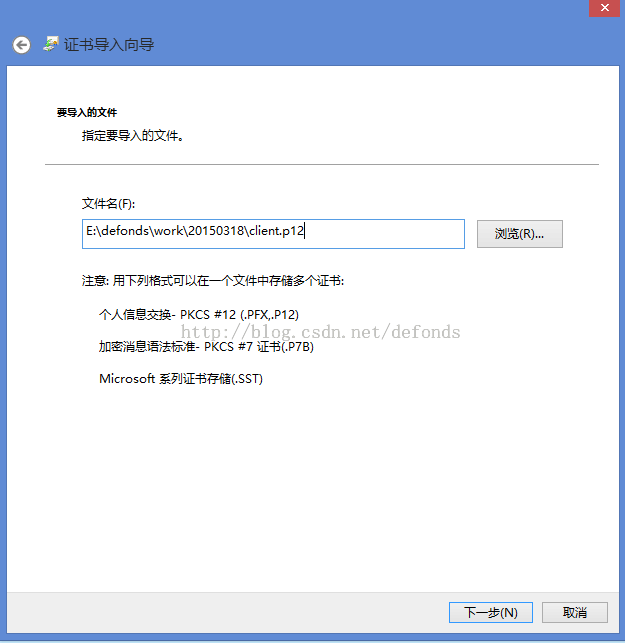
"要导入的文件" 已经为我们选好了,点击 "下一步":
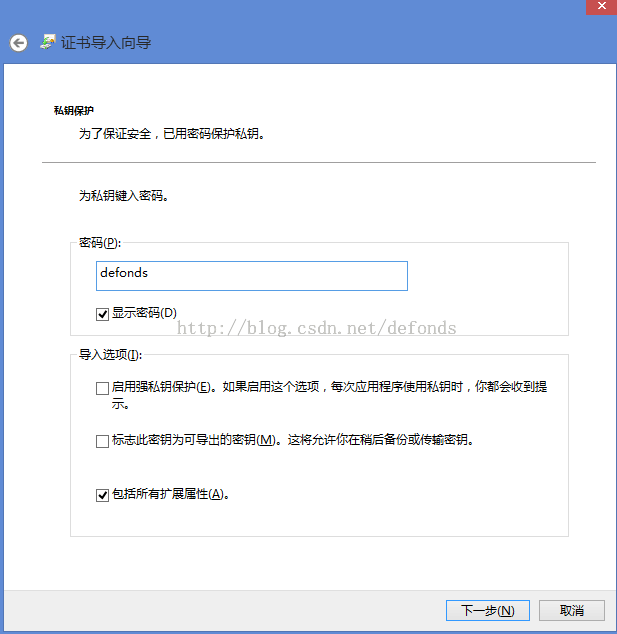
"私钥保护" 对话框输入 2.3.5 步的 Export Password,点击 "下一步":
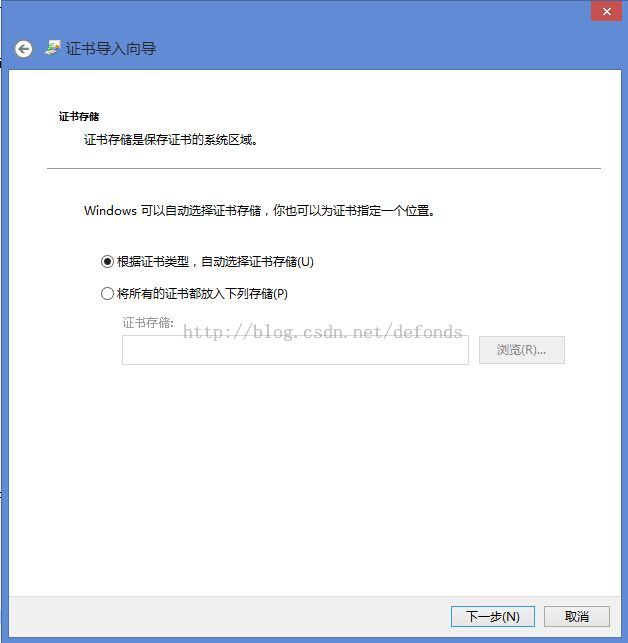
"证书存储" 对话框,我们使用 Windows 自动存储,点击 "下一步":
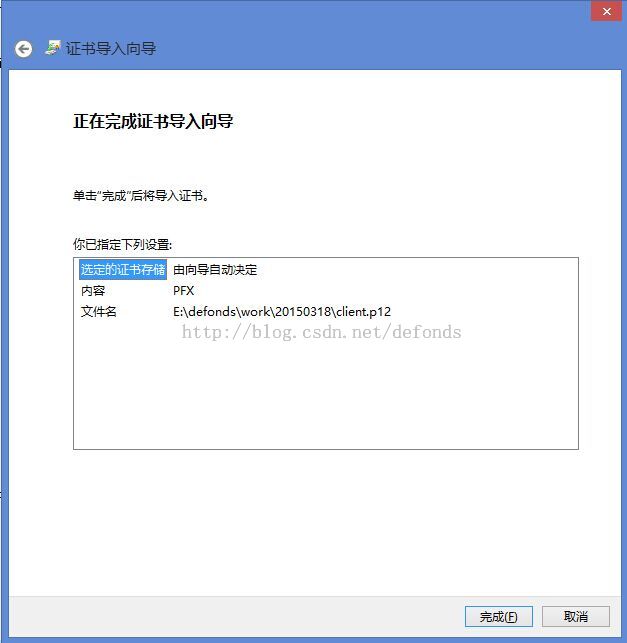
直接点击 "完成" 按钮完成证书导入。
重启谷歌浏览器,再次访问 https://192.168.1.177/swifton,浏览器要求我们选择证书:
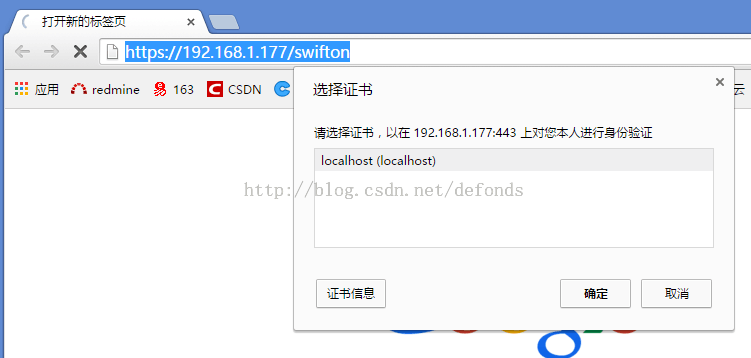
选中刚才安装好的那个证书(localhost(localhost)),点击 "确定",提示 "隐私设置错误":
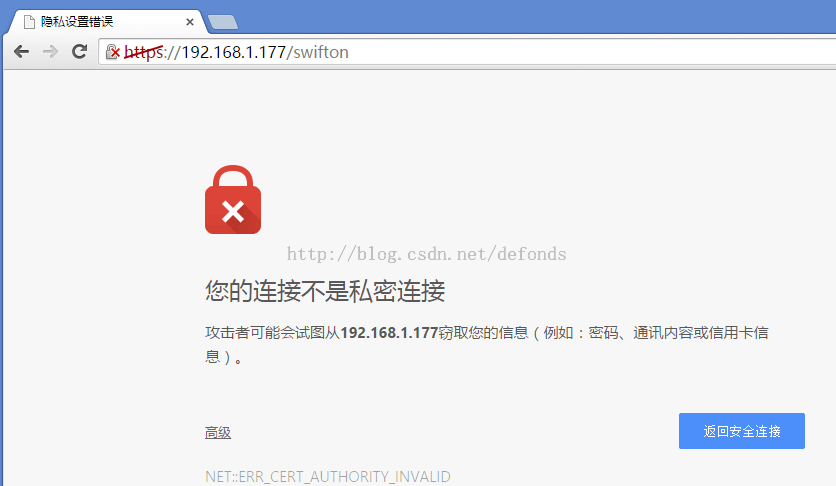
这是因为我们服务器用的是自己签发的证书。选择继续访问,守得云开见月明,终于看到久违了的项目登录页面,成功了:
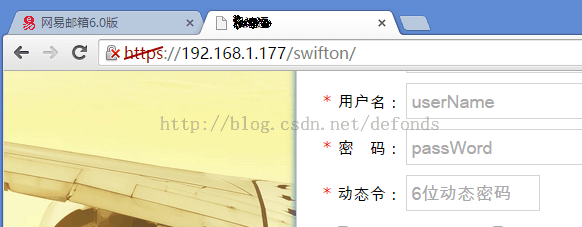
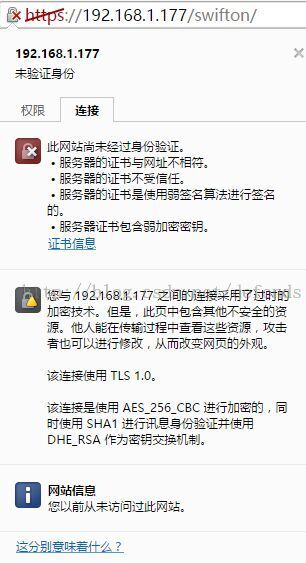
可以点击浏览器输入框左侧的小锁图标查看我们导入的客户端证书相关信息:
6. 双向 SSL 验证的集群配置
Nginx 做负载均衡器,多台 Tomcat 进行集群,在双向 SSL 验证的环境下的配置,和纯 HTTP 没有多少差异。只需注意以下细节即可。
6.1 Nginx 配置
将步骤 3 所述 SSL 配置的以下部分
upstream tomcat_server {
# Tomcat is listening on default 8080 port
       server 192.168.1.177:8080 fail_timeout=0;
   }
修改为
upstream tomcat_server {
# Tomcat is listening on default 8080 port
       ip_hash;
       server 192.168.1.176:8081;
       server 192.168.1.177:8080 fail_timeout=0;
   }
即可。具体负载算法以及服务器列表依照实际情况自行调整。